

How do I replace ignition plug wires in an auto?
Jan 02, 2026
When it comes to maintaining your vehicle's performance, one crucial aspect that often gets overlooked is the ignition system. Among its components, ignition plug wires play a vital role in delivering the electrical charge from the ignition coil to the spark plugs, ensuring proper combustion in the engine. Over time, these wires can wear out, leading to misfires, reduced fuel efficiency, and overall poor engine performance. As an experienced ignition plug auto supplier, I'm here to guide you through the process of replacing ignition plug wires in your vehicle.
Why Replace Ignition Plug Wires?
Before diving into the replacement process, it's essential to understand why replacing ignition plug wires is necessary. Ignition plug wires are exposed to high temperatures, electrical currents, and engine vibrations, which can cause the insulation to deteriorate over time. When the insulation breaks down, it can lead to electrical leakage, resulting in weak or inconsistent spark delivery to the spark plugs. This can cause a range of issues, including rough idling, hesitation during acceleration, and decreased fuel economy.
Replacing the ignition plug wires at regular intervals, typically every 30,000 to 60,000 miles, can help prevent these problems and keep your engine running smoothly. Additionally, upgrading to high-quality ignition plug wires can improve engine performance, increase power output, and enhance fuel efficiency.
Tools and Materials Needed
Before you begin replacing the ignition plug wires, gather the following tools and materials:
- New ignition plug wires (make sure they are compatible with your vehicle's make and model)
- Socket wrench set
- Spark plug wire puller (optional but recommended)
- Dielectric grease
- Safety glasses
- Gloves
Step-by-Step Guide to Replacing Ignition Plug Wires
Now that you have everything you need, let's walk through the process of replacing the ignition plug wires in your vehicle.
Step 1: Prepare Your Vehicle
Park your vehicle on a level surface and turn off the engine. Allow the engine to cool down for at least 30 minutes to avoid burns. Open the hood and locate the ignition coil and spark plugs. Refer to your vehicle's owner's manual if you're unsure where these components are located.
Step 2: Identify the Ignition Plug Wires
Take a close look at the ignition plug wires and identify the order in which they are connected to the ignition coil and spark plugs. It's important to keep track of the wire routing and connection order to ensure proper installation. You can use a marker or label to mark each wire for easy reference.
Step 3: Remove the Old Ignition Plug Wires
Start by removing the negative battery cable to prevent any electrical shock. Then, use a spark plug wire puller or gently pull on the wire boot near the ignition coil to remove the wire from the coil. Be careful not to pull on the wire itself, as this can damage the insulation. Repeat this process for each wire until all the old wires are removed.
Next, move on to the spark plugs. Use a socket wrench to remove the spark plug wire boots from the spark plugs. Again, be gentle and avoid pulling on the wires. Once all the wires are removed, you can set aside the old ignition plug wires.
Step 4: Install the New Ignition Plug Wires
Before installing the new ignition plug wires, apply a small amount of dielectric grease to the inside of each wire boot. This will help create a better electrical connection and prevent moisture from entering the spark plug wells.
Start by connecting the new wires to the ignition coil. Make sure to connect them in the same order as the old wires. Push the wire boots onto the ignition coil terminals until they are firmly seated.
Next, connect the other end of the wires to the spark plugs. Use a socket wrench to tighten the spark plug wire boots onto the spark plugs. Make sure the wires are routed properly and away from any hot engine components or moving parts.
Step 5: Reconnect the Negative Battery Cable
Once all the new ignition plug wires are installed, reconnect the negative battery cable. This will restore power to the vehicle's electrical system.
Step 6: Test the Engine
Start the engine and let it idle for a few minutes. Listen for any unusual noises or vibrations, and check for any signs of misfires. If the engine runs smoothly and there are no issues, you've successfully replaced the ignition plug wires.
Tips for Choosing the Right Ignition Plug Wires
When selecting ignition plug wires for your vehicle, there are a few factors to consider:
- Compatibility: Make sure the wires are compatible with your vehicle's make, model, and engine type.
- Quality: Opt for high-quality ignition plug wires that are made from durable materials and have a good reputation for performance.
- Resistance: Look for wires with low resistance to ensure efficient electrical transfer and a strong spark.
- Insulation: Choose wires with thick, high-quality insulation to prevent electrical leakage and protect against heat and moisture.
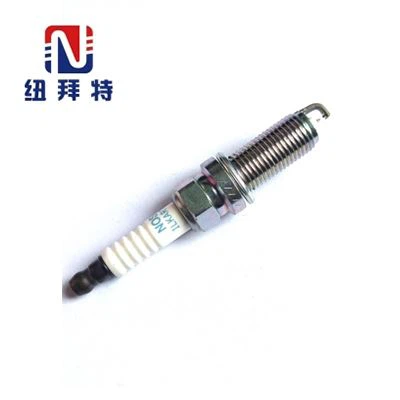
As an ignition plug auto supplier, we offer a wide range of high-quality ignition plug wires to suit various vehicles and applications. Whether you're looking for Car Ignition Plug, Auto Ignition Plug Single Iridium, or Spark Plug Single Iridium, we have the products you need to keep your engine running at its best.

Conclusion
Replacing ignition plug wires is a relatively simple maintenance task that can have a significant impact on your vehicle's performance. By following the steps outlined in this guide and choosing the right ignition plug wires for your vehicle, you can ensure proper combustion, improve fuel efficiency, and extend the life of your engine.
If you have any questions or need further assistance with choosing the right ignition plug wires for your vehicle, don't hesitate to contact us. Our team of experts is here to help you find the best products for your needs and provide you with the support you need to keep your vehicle running smoothly.
References
- Chilton's Complete Auto Repair Manual
- Haynes Repair Manuals
- Motor Age Magazine